related posts
April 5, 2024
In this blog post, we will provide you with the required steps to configure your VS to enable source control on your model.
The first thing we need to do is to create a new project and a model which will be used for that project. You can find out here how to do that.
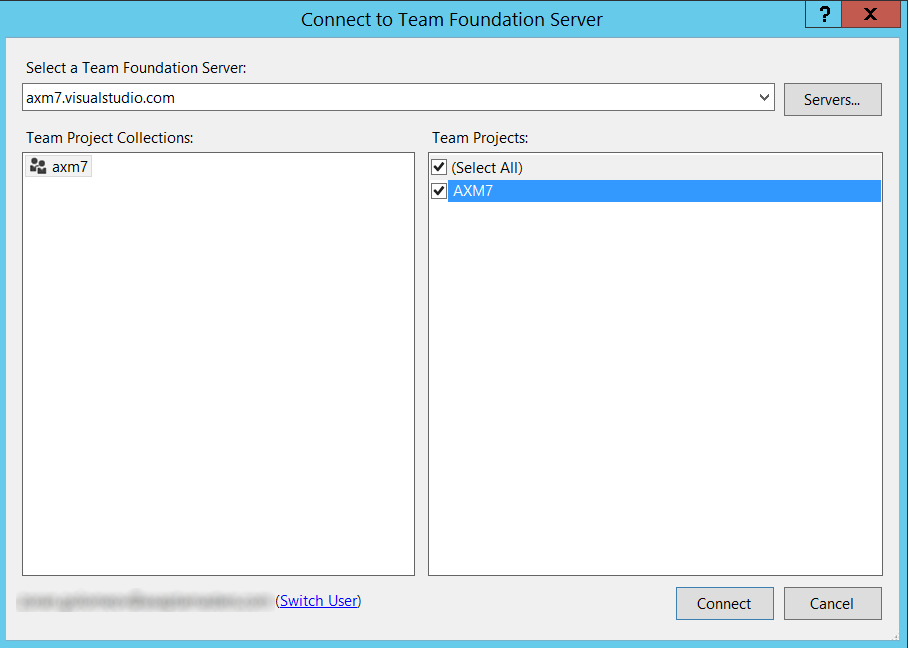
The next step is to connect to your Team Foundation Server. To do this, we need to follow up these steps:


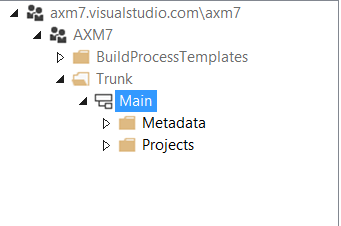
Before starting with development, we need to open the Source Control Explorer and create the following recommended folder structure in our team project.

The source XML files organized by packages and models will be held in the Metadata folder and our VS projects will be in the Projects folder.
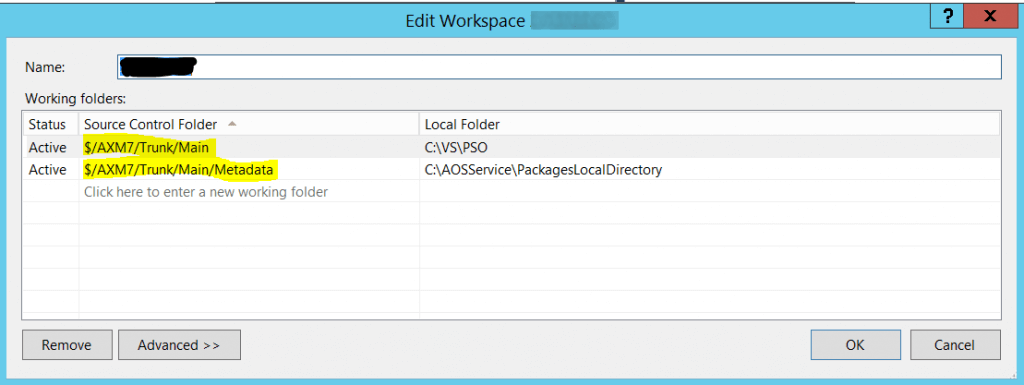
Next step is to configure the mapping for the Metadata and Projects server folder to a local metadata/project folder that will hold our VS solution and project files.

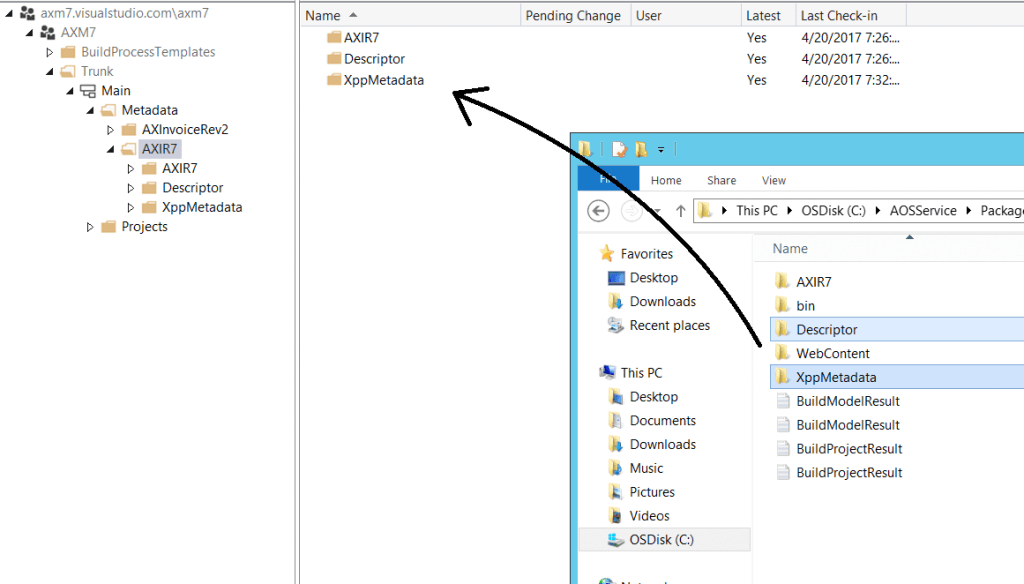
The last step required to be done is to add the mapping for the Descriptor or you will face the problem a lot of people encounter during this configuration “The model <ModelName> specified on the project cannot be found.”. To do this first create such folders locally inside your model repository and drag/drop the Descriptor and XppMetadata folder from there to the TFS branch in the VS. This will automatically create the mapping for these two folders.

You can then start with development in your newly configured environment.
April 5, 2024
YOUR GLOBAL DELIVERING DYNAMICS PARTNER
YOUR GLOBAL DELIVERING DYNAMICS PARTNER
© All rights reserved • Axapta Masters


